Using MultCloud to copy files to other cloud storage services
MultCloud is a cloud-based service which allows you to transfer files and folders between different cloud storage locations, including Google Drive, OneDrive and others.
Important Information
MultCloud is recommended where you want control over what files are moved to which cloud storage location. Once you have setup the copy you can exit your browser and turn off your computer if you wish - the job will continue.
It cannot transfer files from Google Drive to a local hard drive.
MultCloud's free account offers you 5GB of transfers/month. If you select the Guest Access option first then there are varying offers for increased monthly transfers.
It is also critically important that you use the "Cloud Transfer" option - don't use "Copy to" as it is unreliable.
1. Use the MultCloud Guest account
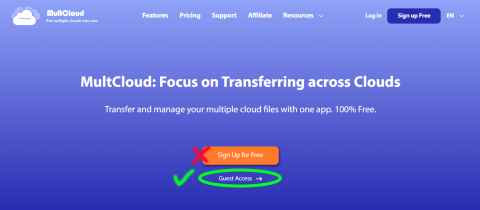
Go to www.multcloud.com and select Guest Access.
This is really important - if you just click "Sign Up for Free" you will get half the monthly transfer amount!
2. Open Multcloud and choose Google Workspace
MultCloud will show some hints that you click Next through and then the final hint you click Got It.
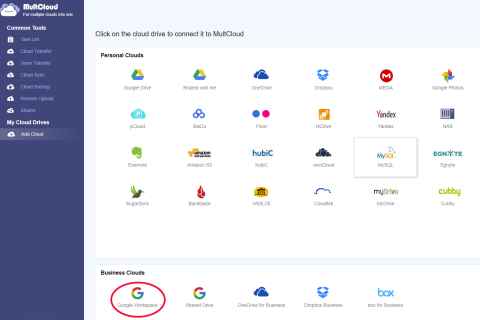
Under Business Clouds select Google Workspace to start the connection to your University of Auckland Google Drive.
3. Select Access Personal Cloud
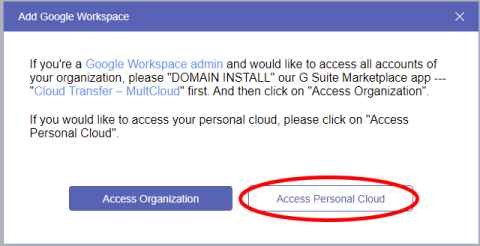
Make sure you select Access Personal Cloud at this window otherwise you will get an error message as you aren't a Google Administrator.
4. Login to Google with your University details
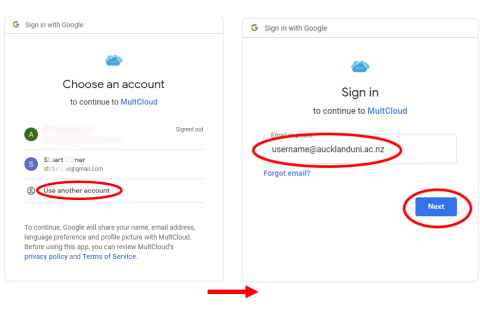
If you are already logged into your University of Auckland google account then you may just need to click on your @aucklanduni.ac.nz account in the list. You may also need to click Use another account if your @aucklanduni.ac.nz account is not shown here.
When you sign-in use your username@aucklanduni.ac.nz details
5. Enter your login details at the University login screen
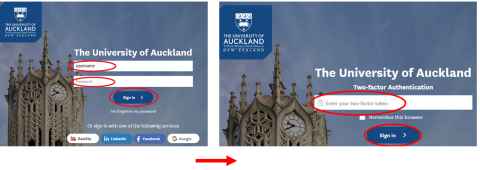
At the usual University clock tower login page enter just your username (not the @aucklanduni.ac.nz part) and usual password. You may also be asked to enter two factor authentication - the same as when accessing other University resources.
6. Allow Multcloud to access your University Google Account
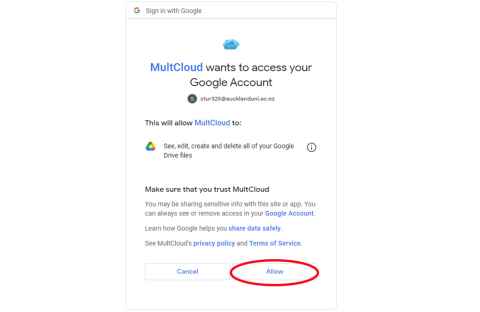
Click Allow to let MultCloud access your University of Auckland Google Account. If you click Cancel then you will not be able to progress further.
7. Add your destination cloud location
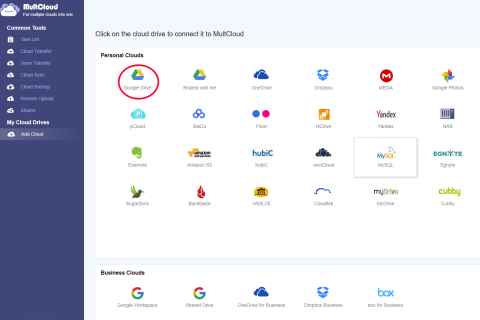
The example here is copying folders to your personal Google Drive, but you can also select from any of the storage providers listed. Any of the storage providers listed under Business Clouds will have needed to be setup previously by Connect. Any of the personal clouds just require your login details for each of those services (you will have needed to set these up previously).
Click on Google Drive under Personal Clouds.
8. Login to your personal Google Drive
At the login screen choose your personal @gmail account and sign in to it.
Multcloud will show the same screen as in step 6. Click Allow.
You should now see Google Workspace and also Google Drive under My Cloud Drives on the left of Multcloud.
9. Select Cloud Transfer
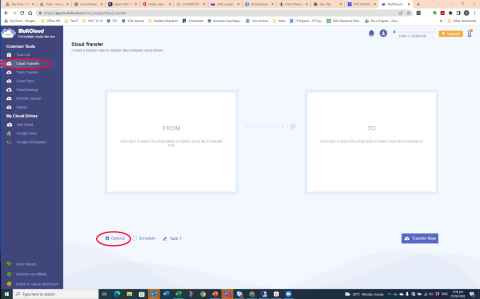
Click on Cloud Transfer then Options.
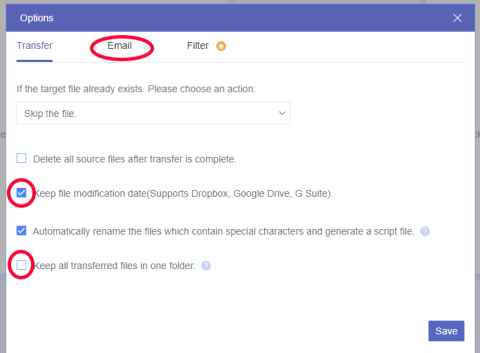
10. Select Transfer Options
- Remove the tick from Keep all transferred files in one folder (if you keep this on then any subfolder structure is flattened at the destination rather than being the same as the original structure)
- Put a tick in Keep file modification date
- Click on Email to choose the email notification settings
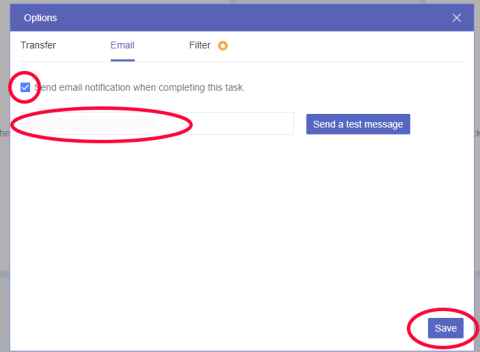
11. Select Email notification
- Put a tick in the Send email notification when completing this task box
- Enter the email address that you want to receive the notification
- You can then either click on Send a test message to check that the notification works
- Click Save
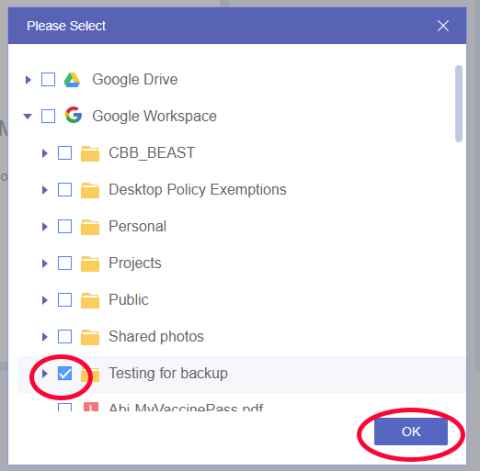
12. Select the source folders to copy
Put a tick against the folders you want to copy. If there are only specific files/folders you can browse the structure and select what you want. Click OK.
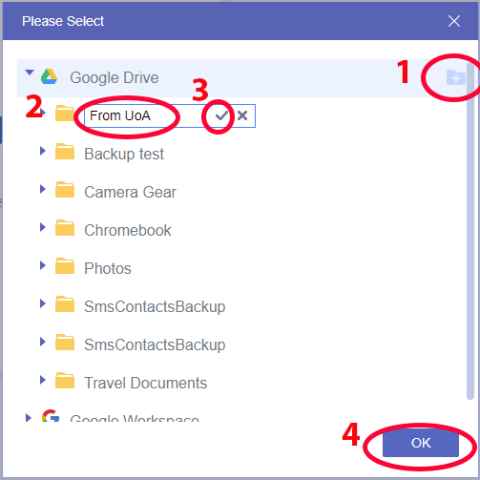
13. Select the destination location
- Click the + folder icon
- Enter "From UoA" or another name that you wish for the destination folder (any folders you have selected will be subfolders underneath this new folder)
- Click the tick to confirm the new folder
- Click OK
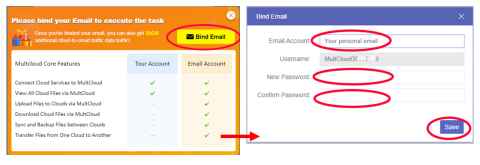
14. Bind your email to get access to changing offers
Select Bind your Email.
Enter your personal email address, make up a password for Multcloud and click Save.
15. Check the transfer
Go to Task List on the left hand side where you can check the status of the job. Once the job has completed it will show a status (hopefully Success) and you can use the View logs option to see more detail. An email will also be sent to you.
